


%20Collectors%20Image.png?width=143&height=143&name=ADC%20(Ambient)%20Collectors%20Image.png)


When it comes to industrial air quality, dust collectors are the unsung backbone of production, working quietly
in the background to keep air clean, equipment protected, and your facility compliant.
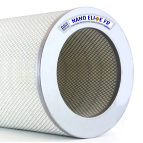
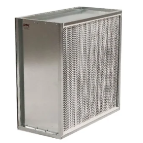
At the core of that system are cartridge dust collection filters - compact, high-precision components that trap microscopic particulate before it spreads. When maintained properly, they keep airflow stable, energy use predictable, and operations uninterrupted. Left unchecked, they can become the bottleneck that slows everything down.
In this guide, we’ve explained how dust collection filters work, when to replace them, and the safest way to
change them - so your system stays reliable, efficient, and clean from the inside out.
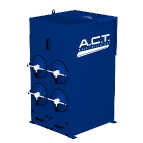
What Cartridge Dust Collector Filters Do
Think of a cartridge dust collector as a box that pulls dirty air in and pushes clean air out. Inside are pleated cartridge filters - the pleats create a lot of surface area in a small space. As air moves through the pleats, the filter media grabs fine industrial dust. A built-in pulse system then gives short bursts of air to knock that dust off the outside of the cartridge so airflow stays strong and pressure drop stays manageable.
Compared with fabric bags, cartridges pack more media into each filter and work well at lower air-to-cloth ratios. In simple terms, they’re great at catching very fine particles while keeping the system efficient. That’s why plants often choose cartridges for welding and cutting operations, smoke from plasma tables, and other sub-micron cartridge dust applications where indoor air quality really matters.
How Often Should You Replace Cartridge Dust Collector Filters?
There isn’t a one-size-fits-all schedule. How often you change filters depends on run time, how much (and what kind of) dust you make, humidity, and whether the pulse-clean system is working well. The simplest way to decide is to track these common signs, indicating it's time to change your dust collector filters:
- Persistently high dP that doesn't recover after pulse cleaning
- Noticeable buildup or bridging on the cartridges or in the hopper
- Decreasing airflow or capture efficiency at process hoods
- Visible leaks, torn pleats, or damaged gaskets
As a general (non-binding) range, facilities running light-to-moderate loading may change filters annually; heavier loading or sticky cartridge dust may require more frequent changes. The key is establishing your baseline and watching for deviations.
Example: In a welding and fabrication facility, cartridges may need replacement every 6-12 months depending on throughput, fume particulates, and shift schedules (actual intervals vary by process and maintenance practice).
Reference your site's maintenance plan and trending history. If you need help evaluating changeout timing or setting dP thresholds, talk to our team.
Factors That Affect Filter Life
Understanding what shortens or extends filter life helps you plan maintenance budgets and avoid surprises.
- Dust characteristics: Abrasive particles erode pleats faster; sticky or fibrous dust can blind the media and resist pulse cleaning. Oil-laden aerosols can embed and block pores. Matching filter media to the dust - whether that's nanofiber layers for fine particulate or specialty finishes for moisture and oil - makes the difference between frequent changeouts and extended service life.
- Environment and moisture: Humidity swings and condensation can cause agglomeration or mudding in the pleats. Even small amounts of moisture can dramatically reduce filter effectiveness!
To extend the life of your filters, maintain dry compressed air for pulse cleaning, eliminate duct leaks that allow moisture in, and insulate duct sections where temperature drops could cause condensation.
- System setup and maintenance: Improper air-to-cloth ratios, weak pulse pressure, or mis-timed pulse sequences shorten life. So do hopper re-entrainment and poor dust discharge practices. Routine checks of valves, solenoids, and diaphragms keep cleaning effective and filters performing as designed.
- Premium media can help: High-efficiency nanofiber layers often shed dust more easily, lowering operating dP and extending life compared with commodity paper blends.
How to Change Cartridge Filters Safely and Efficiently
Proper filter replacement protects both your maintenance team and your equipment. Follow these steps for safe, effective filter changes:
Preparation: Lock out and tag out the dust collector and any connected equipment. Allow the system to cool if handling hot processes. Ensure the area is well-ventilated and that maintenance personnel have appropriate personal protective equipment, including respirators, gloves, and eye protection.
System shutdown: Turn off the collector and wait for all moving parts to stop completely. If your system includes an automatic fire suppression system, follow proper procedures for temporary disabling during maintenance.
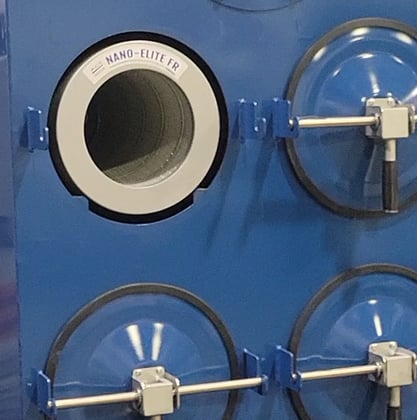
Filter access: Open the filter access doors or remove panels according to your system's design. Many modern cartridge collectors feature convenient access doors that allow filter changes without confined entry.
Filter removal: Carefully remove each filter cartridge, avoiding excessive shaking that could release collected dust. Most cartridge filters include a gasket that seals against the tube sheet. Check that gaskets come away with filters and haven't remained stuck to mounting surfaces.
Inspection: Before installing new filters, inspect the tube sheet and mounting surfaces for damage. Clean any residual dust or debris. Check that all gaskets and seals are in good condition and replace them if necessary.
Installation: Install new filters according to manufacturer specifications, ensuring proper seating and seal compression. Many cartridge filters have a specific orientation indicated by arrows or markings. Double-check that all filters are securely seated before closing access doors.
Disposal: Follow proper procedures for disposing of used filters based on the type of dust collected. Some materials may require special handling or disposal as hazardous waste.
System restart: Remove lockout/tagout devices, close all access doors, and restart the system. Monitor initial operation to ensure proper airflow and no unusual sounds or vibrations.
Best Practices to Extend Filter Life
Proactive maintenance is always cheaper than emergency repairs. Here's how to get the most from your cartridge dust collection filters:
- Stick to your checks: Small issues (sticky diaphragms, cracked door seals) quickly drive up dP. Regular inspections and cleaning keep airflow healthy and prevent downtime.
- Confirm pulse performance: Make sure compressed air is clean and at the right pressure, and the pulse sequence is correct. Weak pulses don’t shed the dust cake; over-pulsing wastes air and can damage pleats.
- Keep moisture out: Seal duct leaks, insulate cold spots, and use dry compressed air. Condensation blinds filter fast and hurt air quality.
- Store spares right: Leave replacements sealed, off the floor, and away from heat/sunlight and moisture. Remember, poor storage can damage filters before they’re installed.
Want a deeper maintenance guide? Learn how to extend the life of your dust collector filters with the right media and a well-rounded maintenance plan.
Choosing the Right Replacement Filters
- Start with the basics: confirm the size/geometry, gasket style, and mounting method your collector uses (e.g., top-load vs. bottom-load, single vs. double gasket). A misfit here causes bypass, higher dP, and premature wear.
- Match the filter media to your process dust and conditions. As a rule of thumb, fine, dry particulates often benefit from nanofiber media for easier pulsing; oily or humid processes may need specialty finishes; hotter airstreams require temperature-rated media. If any of this is unclear, connect with A.C.T. professionals to make an informed decision.
- Small leaks become recurring dust re-entrainment. So, inspect all sealing surfaces, replace gaskets and door seals that are flattened/brittle, and verify even compression across the tube sheet.
- Aim to standardize SKUs where possible. Choose a small set of approved dust collector filters that cover your applications, and keep 1-2 changeouts’ worth in clean, dry storage. Rotate stock so the oldest ships first.
- Last, document the change. Record part number, dP at startup, hours on the last set, and any notes (moisture, caking, unusual wear). These logs turn guesswork into planned filter replacements.
In addition, if your process or working environment has changed - new material, higher loading, or humidity issues - ask our team to review media options and air-to-cloth ratios before you reorder. Small adjustments here can significantly lower lifetime operating costs and improve worker safety.
FAQs About Cartridge Dust Collector Filters
How do I know when my cartridge filter needs replacing?
Monitor your differential pressure gauge for readings that remain elevated even after pulse cleaning cycles. Most systems should operate between 3 to 6 inches of water column. When pressure consistently exceeds your system's normal operating range or you notice reduced suction at collection points, it's time to inspect and likely replace your filters.
Visible dust emissions or physical damage to filters also indicate immediate replacement needs.
What's the difference between cartridge and baghouse filters?
Cartridge filters use pleated media for high surface area in a compact footprint - ideal for fine industrial dust and space-constrained installations. Baghouses use fabric bags and can suit higher temperatures or fibrous dust. Each has its place depending on your application. See our guide to baghouse vs. cartridge for a detailed comparison.
How can I tell if my filters are installed correctly?
Poor seating or damaged seals forces bypass and shortens filter replacements intervals - costing you money and compromising air quality.
To ensure correct installation, check if the installed filters seat firmly against the tube sheet with gaskets creating a complete seal. After installation, check for any gaps around the mounting area and ensure filters are oriented correctly per manufacturer markings. During initial startup, monitor for any unusual vibrations, sounds, or dust emissions from the clean air outlet that might indicate bypass around improperly seated filters.
Do cartridge dust filters remove fumes as well as dust?
Yes, cartridge dust collection filters effectively capture both solid particulate and fine fumes. However, for gaseous contaminants or vapors, you'll need activated carbon or specialized media. For mixed applications, consult A.C.T. team about application-appropriate dust collector filters and controls.
Keep Your System Running at Peak Efficiency
Proactive maintenance beats emergency changeouts every time. If you track differential pressure, keep moisture out, and match filter media to your dust, your cartridge dust collection filters will run longer at a lower total cost.
If you’d like a quick sanity check on intervals, media choices, or a second look at your readings, talk to our team. We’ll help you find the right replacement filters for your dust collector, ensuring a clean, productive, and compliant workplace.
.png?width=240&height=91&name=ACT%20Dust%20Collectors%20Logo%20Solid%20White%202020%20(1).png "ACT Dust Collectors Logo Solid White 2020-2")
.png?width=148&height=149&name=usa-manufactured-dust-collectors%20(1).png "United States Flag")